Dual Z-Axis Belt Thread Rod Kit for Creality & CR-Series Printers
Official Store Deal
Expert Analysis Overview
The Dual Z-Axis Imperative: A Quest for Print Stability
The Dual Z-Axis Belt Thread Rods Holder DIY Kit is a targeted upgrade for popular FDM 3D printers like the Creality Ender 3, Ender 3s Pro, CR10, and CR10S. This system addresses a common limitation in many budget-friendly 3D printers: the single Z-axis lead screw setup. A single Z-axis can introduce instability, leading to visible artifacts in prints, especially taller objects.
The kit is specifically designed for makers keen on refining their machine's mechanical precision. It promises a significant boost in print quality and reliability. This is a crucial modification for serious hobbyists.
Unlike standard single Z-axis configurations, this dual Z-axis kit aims to synchronize vertical movement. It provides consistent and balanced lift across the X-gantry. This prevents sagging on the unsupported side, a frequent complaint among users.
Anatomy of Precision: Decoding the Components
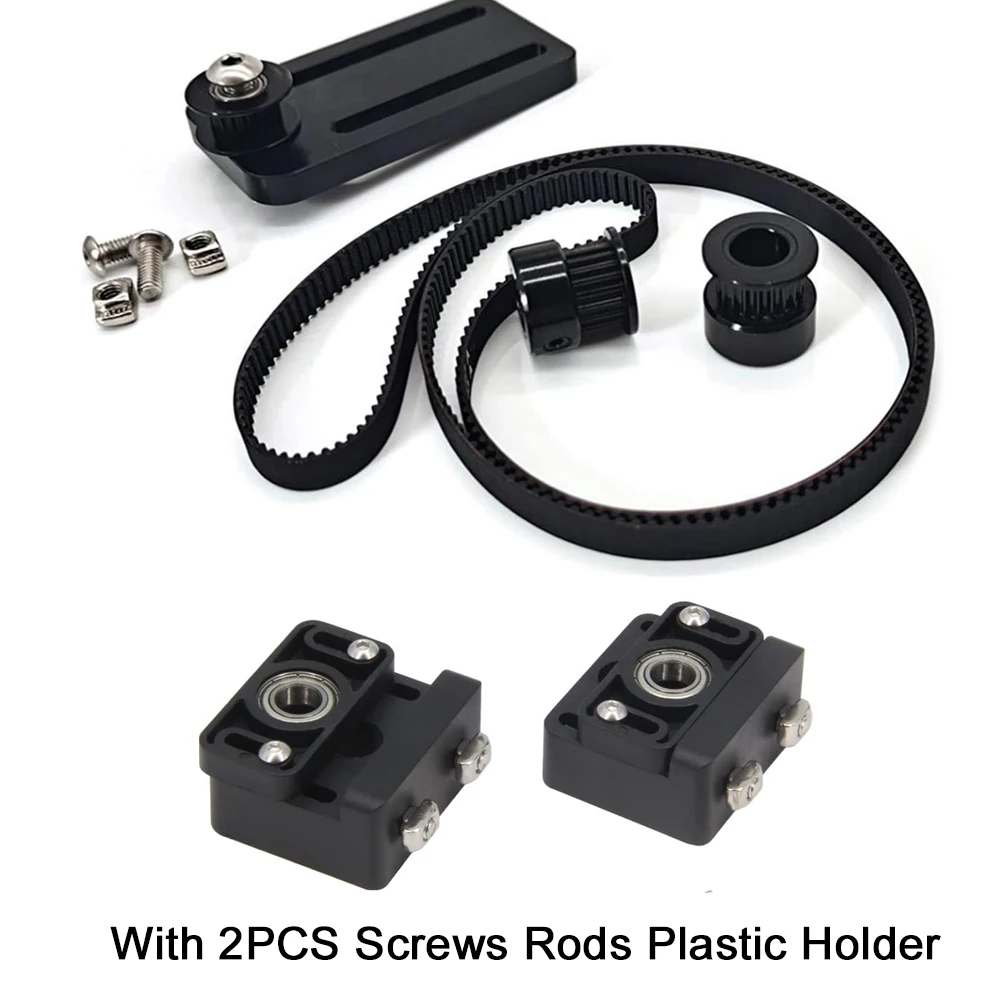
The kit prominently features several key components visible in the product imagery. These include a long timing belt, two belt pulleys, and various mounting brackets. The pulleys appear to be made from a durable black material, likely aluminum, suggesting good wear resistance.
These components work in concert to distribute the load of the X-gantry. The timing belt connects two lead screws, ensuring they rotate in perfect unison. This mechanical synchronization is vital for consistent layer deposition.
Many stock printers rely solely on a single lead screw, which can allow one side of the X-gantry to drag. This kit fundamentally alters that dynamic. It introduces a balanced lifting mechanism.
Further visible components include two Z-axis lead screw top mounts, presented in both plastic and metal variants. The metal holders, specifically, appear to be machined aluminum blocks, offering superior rigidity.
These mounts serve to constrain the top of the Z-axis lead screws. They prevent wobble and ensure vertical alignment. Precise alignment is paramount for smooth Z-axis movement.
Compared to simple printed plastic parts often found in DIY solutions, these machined components suggest greater durability. The inclusion of bearings within these holders further reduces friction. Less friction means smoother travel.
Small metal fasteners and bolts are also part of the kit. These are essential for securely attaching the new components to the printer's existing frame.
Proper fastening is critical for maintaining the rigidity of the entire assembly. Loose connections can undermine the benefits of the upgrade. Attention to detail during installation matters.
Standard printer hardware often uses basic fasteners. The provided hardware ensures compatibility and a secure fit. It minimizes the need for additional parts.
The Assembly Challenge: A Maker's Installation Guide
Installing this dual Z-axis kit is a DIY endeavor, requiring a hands-on approach. The process involves disassembling parts of the existing Z-axis and carefully integrating the new components. Patience is key.
The installation process typically begins with securing the new lead screw mounts. The images show these connecting directly to the top of the existing vertical extrusion profiles. This establishes the upper anchor points.
Proper alignment during this step is crucial. Any misalignment can introduce binding or uneven movement. A plumb line or level might be useful here.
Next, the timing belt and pulleys are fitted. One pulley attaches to the existing Z-axis stepper motor, while the other connects to the new lead screw. The belt then spans between them.
Belt tension must be set correctly. Too loose, and it can slip; too tight, and it can strain the motor. A proper tension ensures efficient power transfer.
This belt-driven synchronization method is often preferred over adding a second stepper motor with its own driver. It simplifies wiring and firmware modifications. A single motor drives both screws.
Finally, the X-gantry needs to be adjusted and re-leveled. The dual Z-axis system will change its natural resting position. Careful calibration is essential for optimal print results.
This final calibration step ensures the print bed remains perpendicular to the Z-axis movement. It is a critical post-installation task. A level gantry means consistent first layers.
Many online communities offer detailed guides and videos for similar installations. These resources can be invaluable. It is a well-documented modification.
Performance Gains: Elevating Print Quality
The primary benefit of this dual Z-axis upgrade is a noticeable improvement in print quality. Eliminating gantry sag directly translates to more consistent layers. Prints become smoother.
Vertical artifacts, often referred to as 'Z-wobble' or 'ghosting', are significantly reduced. This is particularly evident on tall, slender prints. The printer's output becomes more precise.
Imagine printing a complex architectural model or a detailed figurine. The enhanced stability means finer details are reproduced more accurately. Layer lines become less pronounced.
Furthermore, the increased stability reduces stress on the Z-axis stepper motor. A single motor no longer bears the entire load unevenly. This can extend the motor's lifespan.
The balanced load distribution also contributes to quieter operation. Less strain typically means less vibration. A quieter printer is a welcome change.
For users producing functional parts, dimensional accuracy sees a boost. Consistent Z-movement ensures parts fit together as intended. This is crucial for engineering applications.
The Tinkerer's Advantage: Modding for Mastery
This kit appeals directly to the maker and tinkerer community. It embodies the spirit of modifying and improving machines. The DIY aspect is a core part of the appeal.
Users gain deeper insight into their printer's mechanics by performing such an upgrade. Understanding how each component functions is empowering. It builds practical knowledge.
The modification opens doors to further experimentation. With a stable Z-axis, users can confidently push print speeds or explore more demanding materials. The printer's capabilities expand.
Community support for such upgrades is robust. Forums and social media groups are filled with advice, tips, and shared experiences. Troubleshooting becomes a collective effort.
This upgrade is a stepping stone for those who view their 3D printer as a platform for continuous improvement. It is not just a tool; it is a project. The journey of improvement continues.
Consider the satisfaction of seeing a flawlessly printed part, knowing the improvements were made by hand. The effort invested yields tangible results. This fosters a deeper connection with the machine.
Imagine your Creality printer producing models with professional-grade surface finishes, free from the common Z-axis imperfections. This kit transforms the potential of an entry-level machine into a reliable workhorse for intricate projects and consistent output. The enhanced stability will allow for greater confidence in longer prints, knowing that layer consistency is maintained throughout. This is an investment in print quality and a testament to the dedication of the maker. The frustration of wobbling gantries and visible layer inconsistencies can become a distant memory, replaced by the satisfaction of smooth, accurate results.