3D Printer X/Y/Z Axis End Stop Limit Switches (5-Pack)
Official Store Deal
Expert Analysis Overview
Precision Homing: The Core of Motion Control
The 3D Printer X/Y/Z Axis End Stop Limit Switches are a foundational component, essential for the safe and accurate operation of Fused Deposition Modeling (FDM) 3D printers. These compact units serve as the digital "eyes" of the printer, signaling to the control board when a moving axis has reached its physical limit. Without these critical components, a 3D printer cannot reliably establish its home position, leading to potential crashes, skipped steps, and ultimately, failed prints. Their simple yet effective mechanical design ensures that the printer's print head or build plate stops precisely where it should, preventing damage to the machine and maintaining calibration. A printer's first motion after power-up is often to "home" its axes. This sequence involves moving each axis until it triggers its respective end stop. This establishes a known origin point (0,0,0) from which all subsequent print commands are calculated. This initial calibration step is absolutely critical for the accuracy of every printed layer and the overall success of a 3D print.
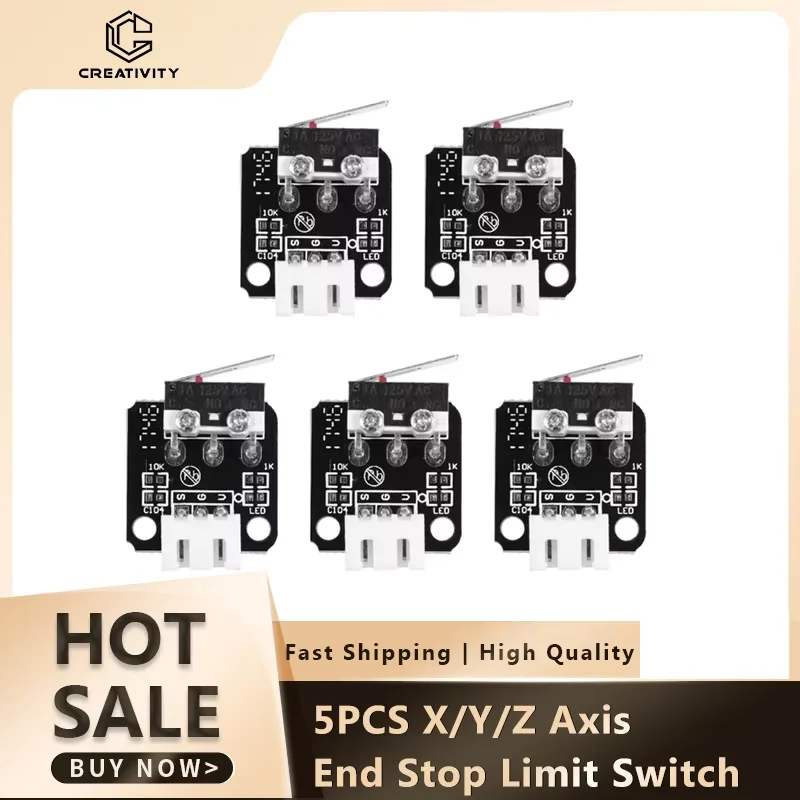
Each switch in this 5-pack comprises a micro switch mounted on a small Printed Circuit Board (PCB), complete with a 3-pin connector. This integrated design simplifies installation considerably. The primary function of an end stop is to provide a reference point for the printer's axes. When an axis moves towards its defined "home" position, it eventually actuates the mechanical lever on the switch. This physical contact triggers an electrical signal, which the printer's firmware interprets as the axis limit. This signal tells the stepper motors to stop, establishing a known zero coordinate for that particular axis. The consistent and repeatable triggering of these switches is paramount for accurate print bed leveling and precise object placement during the printing process. Repeatability is crucial. The ability of the switch to trigger at the exact same physical point every single time ensures that the printer's coordinate system remains stable, which is non-negotiable for producing high-quality, dimensionally accurate parts.
Compared to more complex optical or magnetic sensors, these mechanical limit switches offer a straightforward and robust solution. They operate on a simple contact principle, making them less susceptible to environmental factors like dust or light interference that can sometimes affect non-contact sensors. While other technologies exist, the mechanical switch remains a popular choice due to its proven reliability and ease of implementation in many consumer-grade 3D printers. The clear "click" sound often associated with mechanical switches also provides an audible confirmation of actuation, which can be useful during initial setup and troubleshooting. For a maker building or troubleshooting a machine, this auditory feedback can be incredibly helpful in confirming that the switch is physically engaging as expected, a feature not present in silent optical or Hall effect sensors.
Anatomy of a Micro Switch: Design and Durability
Each end stop module features a compact, black PCB that houses the necessary circuitry and the micro switch itself. The small form factor is a significant advantage, allowing these switches to be discreetly mounted within the tight confines of a 3D printer frame. The PCB is designed for direct connection, typically via a 3-pin header, which simplifies wiring. This eliminates the need for complex soldering or custom cable assemblies, making it accessible even for novice builders. The connections are clearly labeled, often indicating VCC (power), Ground, and Signal, ensuring correct hookup to the mainboard. This clear labeling is a small but important detail that prevents common wiring errors, which can be frustrating for new users or those quickly swapping out components. A simple, visible layout.
The core of the module is the micro switch, characterized by its small size and a metal lever arm. This lever arm is the primary interface between the printer's moving parts (e.g., the gantry, print bed carriage) and the electrical signaling mechanism. When the moving part makes contact with the lever, it depresses a small button within the micro switch, changing its electrical state. The visible construction suggests a durable plastic housing for the micro switch body, designed to withstand repeated mechanical stress. The metal lever itself appears to be spring-loaded, ensuring it returns to its original position after actuation. This spring-back mechanism is crucial for the switch's longevity and consistent performance, as a sticky or slow-returning lever would compromise homing accuracy. The lever's design is critical.
Unlike some rudimentary switches that might expose sensitive internal components, these modules present a self-contained unit. The encapsulation of the micro switch within a robust casing, coupled with its mounting on a dedicated PCB, enhances its overall durability. Standard alternatives often involve bare micro switches that require more intricate mounting solutions and wiring. The integrated PCB and connector on these units significantly streamline the assembly process, reducing potential points of failure associated with exposed wires or loose connections. This thoughtful design contributes to a more reliable and user-friendly experience for printer builders and maintainers, often saving valuable time during setup or repair.
Seamless Integration: A Universal Fit for Popular Platforms
The broad compatibility of these end stop switches is a key selling point, particularly for owners of popular 3D printer models like the Creality CR-10 series and Ender 3. These printers are known for their open-source nature and robust modding communities, making parts like these end stops highly sought after for both replacement and upgrade purposes. The standard 3-pin connector found on these modules aligns with the typical end stop ports present on most 8-bit and 32-bit 3D printer mainboards, facilitating a plug-and-play installation for many users. This universality minimizes compatibility concerns, allowing makers to confidently integrate them into their existing setups. Compatibility simplifies everything. For example, a user upgrading their mainboard from an 8-bit to a 32-bit board, such as an SKR Mini E3, will find these switches directly compatible with the new board's end stop headers, requiring no wiring changes.
Integrating these switches into a printer involves securing them to the frame in a position where the moving axis can reliably trigger the lever. This process often requires only a few small screws or even 3D-printed mounting brackets, which are readily available from community repositories. The small footprint of the PCB ensures that the switch does not obstruct the movement of other printer components. For instance, on an Ender 3, the X-axis end stop is typically mounted on the left vertical extrusion, while the Y-axis switch is often found at the rear of the printer frame, and the Z-axis switch near the Z-motor. Precise placement is key. In a scenario where a user is building a custom printer, the compact nature of these switches allows for flexible mounting options, often enabling them to be tucked away neatly without interfering with the printer's kinematics or build volume.
Compared to proprietary or brand-specific end stops, these generic yet high-quality units offer significant advantages for the maker community. They provide an affordable and easily obtainable alternative, ensuring that a simple component failure does not necessitate purchasing expensive, brand-locked replacement parts. This accessibility fosters a culture of repair and customization, allowing users to maintain and improve their machines without relying solely on original equipment manufacturers. The open-source compatibility truly empowers the tinkerer. This means that if a switch fails, a maker can quickly order a replacement pack like this one, often at a fraction of the cost of an OEM part, and have their printer back up and running with minimal downtime.
Longevity and Uptime: Ensuring Consistent Operation
The design of these mechanical end stops emphasizes a balance between simplicity and durability, crucial for components that undergo thousands of cycles during a printer's lifespan. The micro switch itself is rated for a substantial number of actuations, typically in the millions, before mechanical fatigue sets in. This inherent robustness ensures that the switches will reliably perform their homing function over extended periods of printer operation. The spring-loaded lever mechanism is designed to absorb the impact of contact, distributing the force evenly and minimizing stress on the internal switch components. Consistent homing is vital. A poorly performing end stop can lead to inconsistent layer adhesion, warped prints, or even nozzle crashes into the print bed, all of which waste time and material.
To maximize the operational lifespan, proper installation and alignment are critical. Misalignment can lead to the lever arm being bent or subjected to excessive sideways force, which can accelerate wear or cause premature failure. Users are encouraged to ensure that the moving part of the printer makes clean, head-on contact with the lever. Regular inspection for any signs of physical damage, such as a bent lever or loose mounting screws, can also help prevent unexpected failures. A well-maintained end stop contributes directly to a printer's overall uptime and print success rate. For example, if a user notices their Z-axis homing inconsistently, checking the physical alignment and condition of the Z-axis end stop's lever arm should be one of the first troubleshooting steps. Simple checks save time.
Unlike optical sensors that may require periodic cleaning of lenses or magnetic sensors that can be affected by ambient electromagnetic interference, mechanical switches are largely immune to these issues. Their failure modes are typically physical: either the lever bends, or the internal contacts wear out. This predictability makes troubleshooting relatively straightforward. While a mechanical switch eventually wears out, its replacement is often a quick and inexpensive process, especially when compared to the cost and complexity of replacing an entire sensor assembly in other systems. This simplicity is a major benefit. If a switch does fail, the cost-effectiveness of this 5-pack means a spare is usually on hand, allowing for immediate replacement and minimal disruption to printing schedules.
The Maker's Edge: Upgrades and Community Support
For the avid maker or tinkerer, these end stop switches represent more than just replacement parts; they are fundamental building blocks for custom projects and machine modifications. The standardized nature of these switches means they can be readily integrated into scratch-built 3D printers, CNC machines, or other automated systems requiring precise limit detection. Their ease of wiring and mounting makes them an ideal choice for prototyping and experimentation. This versatility extends beyond just 3D printing, making them a valuable component in any electronics workbench. They are truly fundamental. If a user decides to build a custom CoreXY printer from scratch, for instance, these exact end stops would be a perfectly suitable and economical choice for defining the build volume limits.
The vast online community surrounding 3D printing provides an invaluable resource for users working with these components. Forums, social media groups, and dedicated websites are replete with tutorials, troubleshooting guides, and shared designs for custom mounting solutions. If a user encounters an issue, the collective knowledge of thousands of fellow makers is usually just a search query away. This community support reinforces the utility and accessibility of these common parts, ensuring that even beginners can successfully integrate and troubleshoot them. This collaborative environment enhances the overall user experience. Imagine a scenario where a new builder is unsure about the correct wiring polarity; a quick search on a dedicated forum will likely yield multiple diagrams and explanations from experienced community members.
When considering upgrades, these mechanical switches offer a solid baseline. While some advanced users might opt for optical or Hall effect sensors for extreme precision or silent operation, these mechanical switches provide excellent performance for the vast majority of applications at a significantly lower cost. For those looking to experiment with different firmware configurations, the N/O (Normally Open) and N/C (Normally Closed) options provide flexibility, allowing the switch to be wired in either state depending on the control board's requirements or the user's preference for fail-safe behavior. This adaptability is key for customization. A common practice for some printer firmwares, like Marlin, is to configure end stops as Normally Closed (N/C) because a broken wire would then register as an 'always triggered' state, preventing the axis from crashing, offering a slight safety advantage.
Imagine your 3D printer operating with newfound precision, its movements fluid and confident as each axis homes perfectly every single time. Envision prints that consistently start in the exact location you intended, free from the frustrating shifts and crashes caused by unreliable end stops. These switches offer the peace of mind that comes from knowing your machine is calibrated and protected, allowing you to focus on the creative aspects of 3D printing rather than constant troubleshooting. With this 5-pack, you'll have the spares you need to keep your projects moving forward, ensuring every print is a success. The smooth, uninterrupted flow of your printing projects becomes a reality, empowering you to bring more complex and ambitious designs to life with unwavering confidence in your machine's foundational accuracy.